Acceso rápido a las secciones de este documento
0 - Prologue
When you buy our WHM hosting service, you are hiring a space where you can create your own cPanel accounts.
When buying the service, you receive an email with the access data to the WHM panel.
If you access cPanel with the WHM access data (the user and pass you received by email when buying it) you will see that you only have the option to access WHM available.
If you access cPanel with the WHM access data (the user and pass you received by email when buying it) you will see that you only have the option to access WHM available.
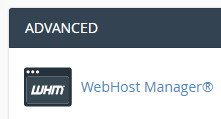
You must access WHM to manage your cPanel accounts, keep reading to understand it
WHM is the panel from where you activate and manage your domains (cPanel accounts). Also known as a reseller or administrator panel.
cPanel is the control panel where you individually manage your websites. Where the final customer has access.
Next, we explain a series of instructions to manage the contracted service.
Next, we explain a series of instructions to manage the contracted service.
1 - Access URLs
If you have an administrator or webmaster who manages your website and you want to give him access, YOU MUST NOT GIVE HIM ACCESS TO ALL YOUR WHM, simply give it access to the cPanel (domain) on which he will work. (See step 4 for more information).
WHM access: http://dominio.com/whm
CPanel access: http://dominio.com/cpanel
Webmail access: http://dominio.com/webmail
You received the username and access password by email when buying the service, if you have lost this email, you can also check the login and change the password from the client area.
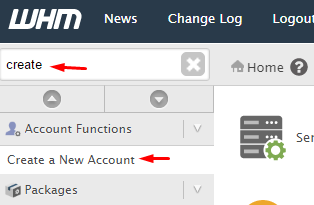
2 - Create a cPanel account (Add domain)
When you want to host a domain, the process consists of creating a cPanel account. The FTP access data will be the same as the cPanel access data and these data (username and password) are defined in the account creation process.
When creating the account, it will ask you to select a package which will determine the disk space limit for that account.
When creating the account, it will ask you to select a package which will determine the disk space limit for that account.
3 - Modify the resources of an account
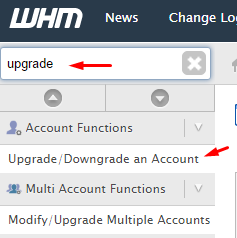
If you want to assign more space to a domain, you must change the associated package.
4 - Access the cPanel of a domain
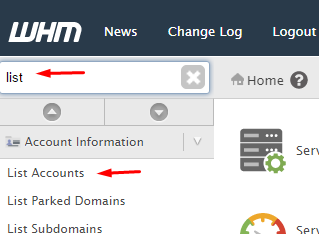
Access WHM (Step 1) and in the option “List accounts” you will see that for each domain you have a button that gives you access to cPanel  without having to enter a password.
If you have an administrator who manages your website and you want to give it access, YOU MUST NOT GIVE HIM ACCESS TO ALL YOUR WHM, just give him access to the cPanel (domain) on which he will work. When you created the cPanel account (step 2) you gave it a unique access password. To change the password, see the next point.
5 - cPanel password and FTP access
The FTP password is the same as that of cPanel. If you do not remember the password, you can change it from “List accounts” (Check the previous step 4), select the domain and displaying its options with the button you will see that one of them is to change the password. The login, you can also see it in “List accounts”.
6 - Create additional FTP accounts
To create an additional FTP account, you must access the cPanel of the domain in question (Step 4).
Then click on the button “FTP Accounts”  and you will be able to define the login and access password for the new user.
You can also restrict access to a specific folder, instead of the full FTP.
Remember that the login of additional FTP accounts always ends with an at + your domain name.
Remember that the login of additional FTP accounts always ends with an at + your domain name.
7 - Manage email accounts
To manage the e-mail accounts, you must access the cPanel of the domain in question (Step 4).
Then click on the button “Email Accounts” 
Among the available options you will find: Create account, Change password, Delete account, Space limit per account and Access to webmail.
When you have created an email account, you can configure it in your email client such as Outlook or Thunderbird by following these instructions.
8 - Copy of all emails sent
There are certain cases in which we are interested in storing all the mail that leaves our server, for example, to monitor and prevent the sending of SPAM.
To do this, I access the “File” icon and then select the “Webmail Access” option
To do this, I access the “File” icon  and then select the “Webmail Access” option.
 and then select the “Webmail Access” option.
In order to view the emails, we must subscribe to the folders where the emails are stored:
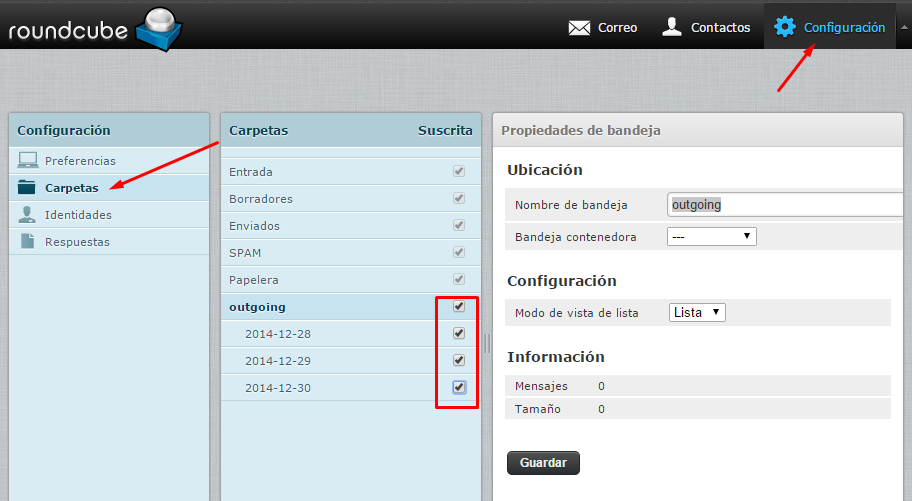
When you have created an email account, you can configure it in your email client such as Outlook or Thunderbird by following these instructions.
9 - Configure AntiSpam
To configure AntiSpam, you must access the cPanel of the domain in question (Step 4).
Then click on the “Spam Filter” button 

When you log in, take a look at this image.

The first box is a checkbox that, when activated, will automatically move the e-mails detected as SPAM to the SPAM folder, so you will not receive them directly in the inbox.
The second box indicates the threshold to consider an email as SPAM or not. By default, all emails are marked as SPAM when they exceed a score of 5.
If you are having a lot of false positives and you want the AntiSpam not to be so demanding, you can raise this value to 6 for example.
On the other hand, if there are emails that are not detected as SPAM and if they are, you should lower the value to 4 for example
If you are having a lot of false positives and you want the AntiSpam not to be so demanding, you can raise this value to 6 for example.
On the other hand, if there are emails that are not detected as SPAM and if they are, you should lower the value to 4 for example
On the other hand, if there are emails that are not detected as SPAM and if they are, you should lower the value to 4 for example.
10 - Install WordPress, Prestashop or any CMS
You must access the cPanel of the domain in question (Step 4).
Search and access the “Softaculous” section, within it you can browse all available CMS. Select the one you want and follow the steps to install it.
11 - Change the PHP version of a domain
To manage the PHP version of a domain, you must access the cPanel of the domain in question (Step 4).
Then click on the button “MultiPHP Manager” 
You will access the interface where you can change the PHP version of each domain that you have hosted in that cPanel account.
The inherit version is the default version that we have configured on the server, that is, when PHP releases a new version and we apply it to the server as the default, all domains that have the inherit version selected will be changed automatically.
12 - Access by SSH
You must access the cPanel of the domain in question (Step 4) and click on the “Terminal” button 

A terminal will open where you can run your commands.

